Washington State University
CAHNRS Information Technology
Setup My Cloud Station Backup
stephanie.m.ogdenIn this article we will explain how to install and configure Cloud Station Backup. This software will allow you to select directories on your computer to be backed up to your CAHNRS Home directory on cloud.cahnrs.wsu.edu.
Pictures can be enlarged by clicking on them. Return to the article by clicking the back button.
- Download the software.
To download Cloud Station please go to https://www.synology.com/en-us/support/download/RS18016xs+ and scroll down on the page until you see the section titled “Cloud Station Backup”. Next click on the link to the software for your computer, i.e. choose the Windows, Mac, or Linux installer as appropriate.

- Run the installer.
Once you have downloaded the appropriate client, please locate the file on your computer and run it.

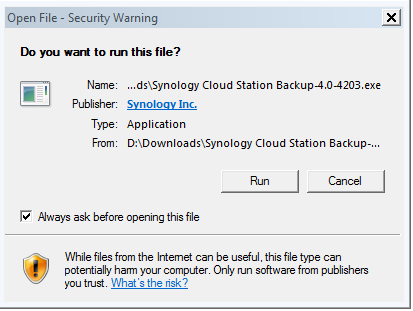
- Confirm install. (Windows)
On Windows you will usually be asked to confirm that you wish to run this program. After clicking OK you may also be asked by a separate security prompt if you trust the creator of this software.
- Choose language.
Once the installer has started the first thing you will be asked is what language you wish to use.

- Begin setup.
The installer will now launch a wizard to guide you through the installation. Please select next.

- Accept the license.
You will be asked if you accept the license. Please select “I Agree”.

- Completed installation.
When the installer completes you will be prompted to “Finish” the installation. Be sure to leave the option “Run Synology Cloud Backup” checked in order for the configuration process to start.

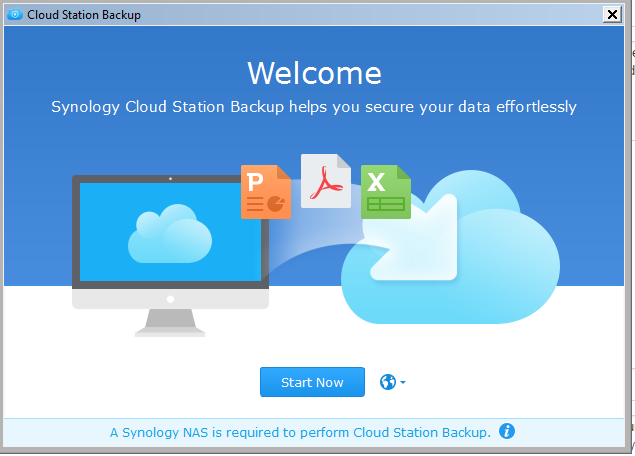
- Begin configuration.
When the installer finishes, or at first run of Cloud Station Backup you will see a Synology splash screen. Click “Start Now” in order to configure your system backups.
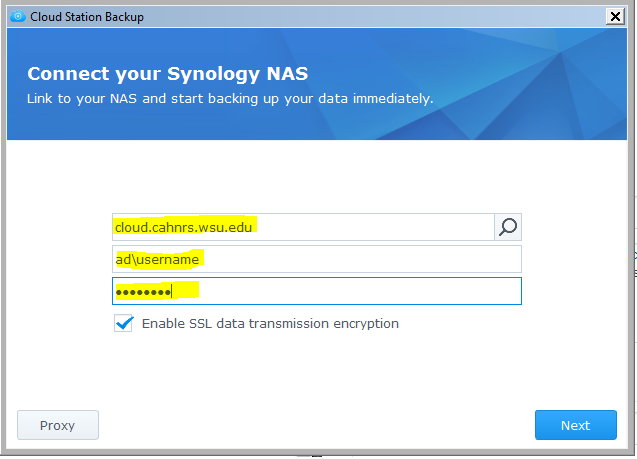
- Connect to the server.
You will be asked to provide the connection details for the server, including address and username and password. Once you enter in the requested information, click “Next” and the system will test your connection to the server.Server: cloud.cahnrs.wsu.edu
Username: ad\NetworkId
Password: Your password
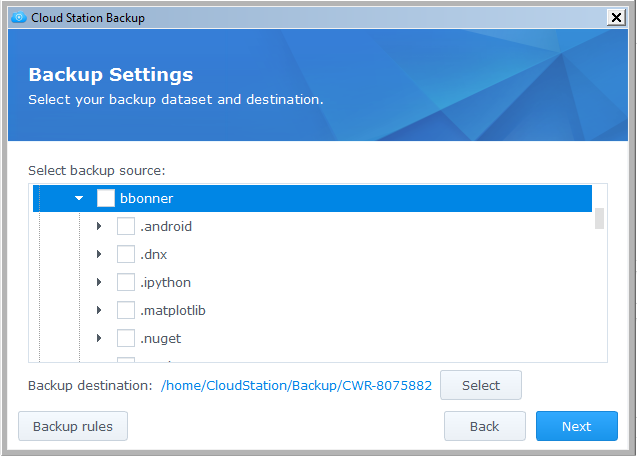
- Select your directories.
On this screen you will have the ability to select the directories that you wish to backup. Examples might include your My Documents, your Desktop, or other important locations. You can also customize the backup destination, but we recommend you use the default. If you wish to create rules to exclude certain types of files, you can make these changes by selecting “Backup rules”. Once you have selected all of your directories select “Next”.
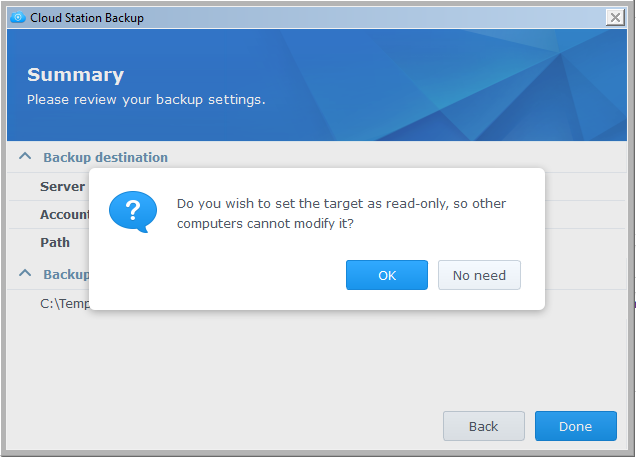
- Finish setup.
Lastly, you will be presented with a summary page of your configurations. If you are happy with the settings choose “Done” to complete the setup. You will then be asked if you wish to make the backup destination read only so other backup processes can’t modify it. If this is the only computer backup you have running then select “Ok”.
If you run into problems during the installation please create a support ticket with CAHNRS IT. Some common errors might be insufficient privileges, meaning your Cloud Station account has not been enabled, or an untrusted certificate warning if you are installing the software off campus. As long as the address you specify is “cloud.cahnrs.wsu.edu” please ignore any such warnings.
First Post
cahnrs.webteamThis is the content for this site’s first post.